Friday, April 27, 2012

boston, boys, and beautiful baked goods

Boston.
Happy Friday everyone! I hope you all have wondrous plans for the upcoming weekend. I'm super excited that my friend, Maudie, will be visiting this weekend and I have all sorts of fun plans for us. Hold on to your maternity pants, Maude, we're gonna take Rhode Island by storm!

Capitol building.
Aside from this exciting news, here are some things on my brain this week:

1. First and foremost, can we all just take a minute to appreciate the beauty that is Boston? (sigh) I made my first trip up to Boston this week and I am kicking myself for not getting up there sooner. The city is ah-may-zing. I think I'm in love. I just can't say enough good things about it. The shopping, the restaurants, the gorgeous old architecture, the beautiful parks, just...everything. 

2. I'm a dating machine lately! Remember when I said that dating pays in steak and wine? Well, it also pays in lobster, ahi tuna, sushi, and cookies from Levain Bakery in NYC. No complaints from me! I am gonna need to lock down a man, though, before my pants get too tight. Single girl problems...

3. In a related note, I am on a mission from God...to recreate Levain Bakery's Dark Chocolate Peanut Butter Chip cookie. This cookie is life changing. No lie. Colors are now brighter, people are friendlier, there is world peace. Okay, that may be a slight exaggeration...but this cookie is still wicked good. I'm hoping to bring you a copycat recipe soon!

4. I learned two new Yiddish words this week! The first is "oy gevalt." It means "oh goodness." The second is "schmeckle." You'll have to look that one up for yourself. :) Here is your challenge for the weekend: use each of these words in a sentence. I find myself saying "oy gevalt" quite frequently now that finals are upon me. :/ Oy gevalt!

5. The cupcake below. One of my professor's brought these in to us for our last day of class this past week. They are from Sweet Cakes Bakery in Wakefield, RI. I cannot get over how CUTE they are! I might have to recreate these sometime soon...


So that's my week in a nutshell...aside from all the normal school and teaching ish. But who wants to hear about that when there are cupcakes to talk about?!?

I hope you all have a fabulous weekend and don't forget your Yiddish assignment! Make "schmeckle" happen! :)

Thursday, April 26, 2012

highlighter hype

Source: Her Campus
So...remember my little come-to-Jesus moment when I had the revelation that I LOVE all things chambray? That was a hard time for me. Chiefly because I questioned whether I should have been taking my father's fashion advice all these years after all. The man who told me I should just go buy my blue jeans at Orscheln's. The man who wears nothing buy ratty overalls when he's at home. Yes, this man probably could have foretold the chambray trend.

However, this latest trend I've stumbled onto? Dear ol' dad never would have predicted this one! In fact, I think it's safe to say that dad wouldn't be caught dead in this trend. Here it goes...lately I can't get enough of neon yellow!

It all started with the photo above. Neon yellow + stripes + navy + a beach in the background. Awesome. I'd wear that whole outfit...on a beach no less.

Source: Teen Vogue
Once I noticed that neon yellow cardigan above, I began seeing neon yellow EVERYWHERE. This shrunken yellow blazer is amazing. I might need this for work. Gorgeous. However, neon yellow is a tricky color to pull off. Ask any construction worker. They'll tell you. You have to have the right complexion. I'm pretty sure that's why some people don't go into construction. The hard hats would just wash them right out. How sad. :(

Source: Pinterest
Because neon yellow is so tricky to pull off, I'm kinda digging all the neon yellow accessories I've been seeing everywhere. Just as fun as the outfits above, but waaaay less of a commitment. Take the outfit above for example. Cute colored denim, neutral shoes and jacket, plus crazy bright statement necklace and bangle. Love! I need that necklace in my life...like immediately.

Source: Pinterest 
 Or, even better...I'll take this Celine tote. Shut the front door. Look at that thing. Gorgeous. 'Nuff said.

Source: 8th Fashion Avenue Tumblr
You know I couldn't do a fashion post without some high heels involved! My one concern with this trend is that neon yellow can tend to look cheap. I've been seeing lots of neon yellow heels lately, but I like that these are not shiny and gaudy. The suede somehow tones them down a bit. Plus, those platforms are amazing!

Source: Bohemian Angelz Tumblr
And, finally, for those not wanting to commit to neon yellow just yet...how about a $2 commitment? I've been seeing yellow nail polish everywhere and it looks so good paired with a tan. I'll be sporting this shade most of the summer, no doubt.

So, what do you think? Am I crazy? Actually, don't answer that...

Wednesday, April 25, 2012

maple oat scones


Question: what's up with the sudden obsession with muffin tops? The food. Not the unfortunate spare tire I keep seeing above many a waistband these days. I hear commercials for muffin tops, see them at every bakery, hear people raving.

Confession: I just don't get it. Since when did the entire human race mutually decide that the muffin stump was so vile? It's the exact same thing as the top of the muffin people! It's all muffin all the time up in there! Stump or top, it's gonna taste the same. And, for that matter, who can possibly be full off a danged muffin top? Psssht. Those aren't the kind of people I have any interest in knowing, that's for certain. I'm an equal opportunity muffin eater, I love muffin top and stump equally. Don't hate, appreciate!


Guess what's great about scones? No top/stump deliberation. It's just a simple scone. No debate. Just home-baked goodness. And this particular variety will not disappoint. Maple syrup + oatmeal = the perfect on-the-go breakfast...especially for those days when you're just not sure where you stand in the great muffin top/stump debate. (sigh)

Are you getting sick of scone recipes yet? Good, because I could make scones until my dying days. I just love 'em so much! Look out for another scone recipe coming your way next week. Scones for life!

Maple Oat Scones

Ingredients:
1 1/2 cups all purpose flour
3/4 cups quick cooking oats
2 tbsp sugar
1 1/2 tsp baking powder
1/4 tsp salt
1/3 cup butter, cold
1/4 cup pure maple syrup
1/2 cup buttermilk
1/2 tsp vanilla extract
cinnamon glaze (recipe below)

Preheat oven to 400F. Line baking sheet with parchment paper or use baking stone.

In a large bowl, whisk together flour, oats, sugar, baking powder and salt. Cut in butter with your fingertips, making sure no pieces larger than a big pea remain.

In a medium bowl, whisk together maple syrup, buttermilk and vanilla. Pour into flour mixture and stir until the dough comes together.

Place dough onto baking sheet and press into a circle, approximately 1/2 inch thick and 7 inches in diameter. Cut into six slices.

Bake for 20-24 minutes, until scones are golden brown. Transfer scones to a wire rack and allow to cool slightly before drizzling with glaze.

Cinnamon Glaze
1 cup confectioners’ sugar
2-3 tbsp milk
1/2 tsp ground cinnamon

In a small bowl, whisk together confectioners’ sugar, 2 tbsp milk and cinnamon until smooth. Add more milk if necessary, to smooth glaze and bring it to a pourable consistency.

Drizzle over scones.

Yields 6 scones
Source: Slightly adapted from Baking Bites

Tuesday, April 24, 2012

lime-coconut white chip macadamia nut cookies


Oh hey! I made you cookies...with my brand spankin' new hand mixer, too, might I add. It was a pretty dreamy experience, particularly after dealing with my $10 Wal-Mart hand mixer for a whole dang year! Good riddance, Wal-Mart hand mixer. I wish I could say we had some good times together...but mostly you just flung dough on me and my kitchen. Sooo...yeah.

One thing you should know about these cookies...this recipe makes a metric TON of cookies. Be prepared. Not that eating them will be any great pain. I took mine to class with me last week and everyone helped themselves to seconds and thirds...and fourths. So, yeah, I guess you could say they were a hit. Macadamia nuts + white chocolate chips + coconut + lime zest = magic. :)


Lime-Coconut White Chip Macadamia Nut Cookies

Ingredients:
2 cups flour
1/2 teaspoons baking soda
1/2 teaspoon table salt
12 tablespoons unsalted butter melted and cooled until luke warm
1 cup brown sugar
1/2 cup granulated sugar
1 large egg + 1 egg yolk
2 teaspoons vanilla extract
1 cup chopped white chocolate or white chocolate chips
1 cup coconut (toasted or untoasted)
1 cup toasted macadamia nuts
1 1/2-2 tablespoons grated lime zest (1-2 limes)

Directions:
If you haven’t melted your butter yet, do that so it has time to cool off. Heat oven to 325 degrees.

Mix flour, salt, and baking soda together in medium bowl; set aside.

Either by hand or with electric mixer, mix butter and sugars until thoroughly blended. Mix in egg, yolk, and vanilla. Add dry ingredients and mix until combined.

Add white chocolate chips, coconut, macadamia nuts, and lime zest. Mix to distribute.

Scoop cookie dough into balls and place on parchment lined baking sheets. Bake until cookies are set around outer edges, yet centers are still soft and puffy, and appear slightly under-baked, about 9-10 minutes (all ovens are different, keep an eye on them!) Cool cookies on cookie sheets for a few minutes and then transfer to a cooling rack.

Source: Our Best Bites

Monday, April 23, 2012

reduce, reuse, recycle: garden stand


Happy belated Earth Day people! Today's post is in the spirit of Reduce, Reuse, Recycle...

This is the tale of an awkward little table that aspired to be something more than an awkward little table. A table that knew it had the potential to do great things. A table that wanted to move out of it's dark corner into a place in the spotlight.

The table above has had a long life. It was originally part of a display at Bath & Body Works. Then, it became my old roommates TV stand. She was ready to trash the thing during a move when I stepped in and adopted it. Since I've had it, it's been a jewelry stand but it had potential to be so much more.


So, recently I made a Home Depot run and picked up a couple pieces of plywood, some L-brackets, and a can of white spray paint. An hour later this guy had a new lease on life as my new garden stand! This awkward table is moving up in the world!


My previous forays into gardening have been met with failure after failure. Last year, I acquired some heirloom tomato plants as well as some basil. Both died before June due to the freakish Kansas heat. This year, however, armed with a climate controlled apartment and mild Rhode Island weather, I'm adamant that my thumb will finally become green.


I decided to start with a simple herb garden. Baby steps, people. Plus, herbs are something I use in my cooking all the time so having a constant fresh supply is pretty ideal. Here's the layout, from left to right: chives, cilantro, and rosemary. My most recent addition is a basil plant (below) and I have intentions to plant some mint next to the chives as soon as I can find some. 


So, keep your fingers crossed for my little herb garden. If it thrives...or at least survives...I have big plans for pesto, fresh salsa, mojitos, and more! Stay tuned...and go recycle something! :)

Friday, April 20, 2012

beaches and boys


I miss Kansas. I really do. But Rhode Island is growing on me. Especially on the random Tuesday afternoons when I can head down to the beach after teaching and take in views like the one above. Those days make me pretty happy to live in The Ocean State.

On a related note, my skin is on FIRE and I look like a tomato! Might have to stock up on the ol' sunblock before I take in any more beautiful beach views. Ouch.

Besides sand and sun, this week has also been filled with school projects, more grading, and long talks with good friends. However, I am making time to do a little dating as well. In fact, more than a little dating. It's become a part-time job. There's no health insurance, but the pay is steak and wine so that's pretty awesome. More jobs should pay in steak and wine, no?

Anyway, one date down. Three more scheduled for the next few days. At this rate, I will have dated every male in Rhode Island by the end of the summer....and most males in the greater Boston area by fall. But, hey, I'm a go-getter. I don't half ass things...including my dating life. Go hard or go home, people!

Hopefully I'll have some humorous anecdotes to share with you next week. In the meantime, I'll be munching on some leftover steak and frites and slathering aloe vera on my burn. How's that for weekend plans? Happy Friday everyone!

Thursday, April 19, 2012

lasagna-stuffed portobellos


All I ever wanted in life was a man who would eat carbs with me. Is that so much to ask? Apparently, it is because I cannot for the life of me find a fella who fits this one specification. Sheesh!

I know what you're thinking. But Katy, everyone eats carbs. You would think so, wouldn't you? I thought so too. However, recently I find myself on a streak of carb-haters. And, I'll tell you one thing...if a man doesn't eat carbs, there's no trusting him. There's something that's just not natural about a carb-free man.

Working backward there was Dr. Allergies. No that's not his real name. It's a pseudonym. The man was allergic to every food on God's green Earth...including gluten. How's a baker like myself supposed to work with that? I embraced homemade ice cream making for a while. But it just wasn't the same. It was doomed from the start.

Before him there was Mr. Health Nut. Perhaps the only thing worse than not being able to eat carbs? Choosing not to eat carbs. It's sick, really. How are you gonna inhale half of my homemade apple pie and then tell me you've decided carbs are the devil? Get out of town. No, I'll get out of town. And don't you ever even think about my apple pie again. And that's how that ended.

So, here's what it comes down to...I have ONE standard. ONE. Be willing and able to eat carbs when I make them for you. That's all I ask. And, yet, it would appear that I'm doomed to date carb haters forever.

So, although, I still refuse to change my standards, I do dedicate this recipe to those two fellas. Had things worked out between us, we would have BOTH enjoyed this meal. Too bad...I ate them all myself. ;)

Lasagna-Stuffed Portobellos

Note: My portobello caps were on the small side, so I stuffed six caps. Two per serving.

Ingredients:
2 cloves garlic, minced
1/2 tsp Italian seasoning, divided
1 Tbs olive oil
kosher salt and freshly ground black pepper
3-4 portobello mushroom caps
1 cup ricotta (part-skim or full -fat)
1/4 cup Parmesan, plus 2-3 Tbs for sprinkling over mushrooms
4 oz. fresh mozzarella, divided
2 Tbs chopped fresh basil
1/4 cup breadcrumbs
about 1 cup marinara sauce

Directions:
Preheat the oven to 425 degrees. Use a butter knife to scrape the gills out of the mushroom caps.

In a small bowl, combine half the garlic, 1/4 teaspoon of the Italian seasoning, olive oil, and salt and pepper to taste. Brush the inside and outside of the caps with the mixture, and roast cap-side down for about 10 minutes. If the mushroom gives off water, blot it up with a paper towel.

Meanwhile, in a medium bowl stir together the ricotta, remaining garlic and Italian seasoning, Parmesan, 3 ounces of mozzarella, basil, and breadcrumbs. Season with salt and pepper to taste.

Spoon about 2 teaspoons of the marinara into each mushroom cap, then stuff with the ricotta mixture. Spoon about 1-2 teaspoons of sauce over the ricotta, then sprinkle the remaining Parmesan and mozzarella over the sauce.

Bake 10-15 minutes, or until the filling is heated through and the cheese has melted. Serve with additional marinara.
Serves 3
Source: Pink Parsley

Wednesday, April 18, 2012

chair project: reconstruction


Without further adieu...the big reveal! Here's the "before" shot again to remind you of the mustard crushed velvet atrocity that was this chair. And....


The "after"!!!! I love decorating with white so I chose a white material with a circle pattern. It was a bit of a splurge (more on that below) but totally worth it. I also refinished the frame of the chair. I liked the original wood, but it was not in the best of shape. So...gold it was! I'm so happy with the results...but it was a learning experience to be sure.


Things I've learned about upholstery:

1. Patience is a virtue. It is a loooong process. True, I worked on this chair sporadically, but it is definitely not a project you can expect to do in a day or two. Just removing the original fabric took me countless hours. I'm fairly certain those staples were from the devil. Ultimately, I ended up just ripping off most of the fabric because those staples were impossible to remove. Don't be like me.

2. Supplies are not cheap. Thank goodness the chair was cheap, because supplies began adding up quickly. The fabric alone was $40/yard from Joann's (thank goodness I had a 50% off coupon!). I found that upholstery fabric is quite a bit more expensive than most fabrics. However, I wanted to ensure that this fabric would last a while so I splurged for the better quality. On top of fabric, I also had to replace the cushion. I originally thought I'd be able to use the original but it was disintegrating and I felt like I needed a shower just touching the thing. Yuck! Anyway, cushion padding is pricey as well! Other than those two things, most other supplies were fairly inexpensive and I made a buddy at the local upholstery shop who sold me a few products for basically nothing. Score!

3. Upholstery is a "learn as you go" kind of process. I could tell you step-by-step exactly how I completed this project. But, honestly, it wouldn't be very helpful because every piece of furniture is different. My suggestion? Take boatloads of pictures as you go so you'll remember how the original was put together. I also saved and numbered every piece of fabric, trim, and stuffing as I went so that I could reference the original pieces if needed. And I was glad I did! However, I was even gladder to finally kick that skanky fabric to the curb. Yucky.

I hope this little reflection hasn't been too discouraging to those of you potential upholsterers. It was a very long, tedious process but the finished product made all the work worthwhile. Who knows? Maybe I'll take on another upholstery project one of these days. Maybe. ;)

Tuesday, April 17, 2012

chair project: deconstruction


A loooong, long time ago, I mentioned a chair project that I've been working on. It's been a long, slow process (that is still not 100% done), but I couldn't wait any longer...I had to show you the results of my reupholstery project!

I've been intrigued by reupholstery for a while now...ever since I love cute furniture that I can't afford. I have expensive tastes. What can I say? So, I decided to take matters into my own hands and MAKE a chair I loved.

You can see the "after" photo above. Didn't it turn out great?!? Haha! No. I'm kidding. That's totally the "before." I found this beauty on Craig's List and it cost me a whopping $30. I loved the unique shape and size. And this sucker is SUPER comfortable. However, mustard crushed velvet???? Those words should not even be in the same sentence together, let alone on a beautiful chair like this! It's a crime! So, I set out to right it.


Hands down, the worst part of reupholstery has got to be the deconstruction process.

Major Obstacle #1: There were literally thousands of heavy duty staples in this chair, most of which were stapled in so well that they were actually invisible through the fabric. After roughly three days of painstaking staple pulling (and serious consideration of getting a tetanus shot), I finally gave up and just began tearing the fabric off.


Major Obstacle #2: Even when you get so frustrated with the staple situation that you start tearing off the fabric like a woman possessed, you have to be super careful not to ruin the original material. Yes, even though I was determined to incinerate that nasty fabric as soon as humanly possible, I still had to use the pieces as a guide for cutting the new material. Yuck.


Now that I've bitched and moaned about what a pain upholstery is, I hope you're all feeling inspired to take on an upholstery project yourself! Haha, no, the worst part is over. Tomorrow I'll be back to show you the "after" shot. It turned out so great and was absolutely worth all the blood, sweat, and tears...and tetanus.

Monday, April 16, 2012

diy dyed toms

My old Toms.
How was your weekend? I tried to be productive...but this amazing weather just makes my brain reject school work. So, instead I did crafts! Downside: now I have to cram a weekend's worth of homework into one evening. Upside: I have lots of craftiness to share with you lovely folks this week! Yes, my priorities are in line. Why do you ask?

First thing on the agenda this weekend? Dying my old Toms. I have had my Toms for years now and they've definitely seen better days. When I originally purchased the pair above, they had been hand painted. You can still see the remains of that paint job on the elastic band. Yeah, I paid extra for the hand painting. Don't remind me.

As one might imagine, these suckers got nasty after a while and I was finally forced to toss them in the washing machine. It did take out the dirt and grime...but it also took out the color! I was left with an extremely faded and sad looking pair of Toms. Boo hoo.

Shoe bondage.
I haven't really worn my Toms much since the Washing Machine Incident of 2010. It's hard for me to talk about even now. (tear) So this weekend I decided to give these babies a new lease on life. A good dye job can work wonders my friends.

For this pair, I wanted something bright and fun, but dark enough to cover up the old color. I chose iDye brand dye in the Kelly Green shade. If any of you are considering doing this (or any other dye projects), I definitely recommend that brand. They have TONS of colors (like at least seven shades of green!) and it comes in a nice little packet that you just toss in the water. So easy and the color ended up being a perfect match to the color on the package.

So I tied those babies up (to give them a tie dye effect) and gave 'em the plunge...

Kelly green Toms!
Here's the after. I absolutely love the color and I like that it only absorbed into the actual material, not the sole, elastic band, or tags. Perfect, no? I can pretend that I did that on purpose but it's totally a happy accident. I also like that you can see the pattern of the original paint job, but it just adds to the tie dye effect. So cute!


If you want to dye your Toms...or anything else for that matter, just follow the directions on the dye package. The only step I added was binding them up in twine beforehand to create the tie dye effect, but that's totally optional depending on the look you're going for.

I should warn you though...once you dye one thing, you may be hooked. I'm now scouring my apartment for other things to dye. This could become a problem...I've already been eyeing a pair of white jeans and some white bathroom rugs that are practically begging to become a new (and improved) color. I might need a professional intervention. Just saying. I also dyed something else in this batch but that project will have to wait for now...

Now go dye something, fool!

Friday, April 13, 2012

(random and chaotic) friday thoughts


Happy Friday everyone! Don't you just love this quote? It's like Kate Spade knows ME, like deep down to my core! Voracious reader? Check. Fantastic dancer? Check, in my humble opinion at least. Haha! Saves old scrapbooks? Duh. Loses her umbrella? Well, as I matter of fact, I did lose my umbrella on a date a while back. Rats. That reminds me I need a new umbrella. I need to start buying those things in bulk.

Anyway, here are some of the things filling my Katy brain this fine Friday:

1. This video. Have you seen it? My sister told me about it and I keep singing bits and pieces of it. Probably shouldn't do that in public, though. :S Don't drink that, don't drink that racist coffee!

2. I bit the bullet and bought a new hand mixer. This one to be exact. I've decided to call it The Green Machine from here on out so please don't be confused when I use that reference in the future. First test for The Green Machine? These cookies. Can't wait!

3. I am obsessing over the previews for The Lucky One. Anyone else? Also, I feel slightly like a pedophile every time I drool over Zac Efron. Damn you and your sexy, sexy self, Zac Efron! Oh, never mind, I just Googled his age and he's only a year younger than me. Sweet. Carry on, Zac Efron.

4. So I've decided to get back on the horse and do a little online dating. Let the shenanigans ensue. My dating life tends to make for some hilarious anecdotes. If y'all would be interested, I was thinking I might post about my follies (and potential successes!) in dating. If nothing else, I'm sure it will be good for a chuckle or two.

5. My mission for this weekend is to catch up on my grading so if anybody needs me I'll be at Starbucks overdosing on iced coffees. Mmmmk, thanks.

Happy weekend, y'all!

Thursday, April 12, 2012

cinnamon sugar muffins


So I posted these Cinnamon Brown Butter Breakfast Puffs a few weeks ago. They were good. However, I'm one who can never leave well enough alone. I'm always trying new recipes, looking for the BEST version imaginable. Case in point: my mom's chili. Her chili has always been one of my very favorite meals. Yet, I continue to try new chili recipes, looking for the one that might be able to top it. Still haven't found it. Maybe I should give up on that one? Mom's chili is just too perfect!

Muffin assembly line.
Anyway, in this case, my experimenting has paid off. While the last Cinnamon Brown Butter Breakfast Puffs were good, these are better. Like...seriously awesome. It's lucky you all have someone like me willing to do the legwork to bring you the best possible muffins. Taste testing muffins all day. Buttery, sugary, warm muffins. Sheesh, it's a rough life being me. ;)

Buttered and sugared. Yum!
Cinnamon Sugar Muffins

Ingredients:
1/3 cup (5 tablespoons) butter, softened
1/2 cup granulated sugar
1 large egg
1 teaspoon vanilla extract
3/4 cup whole wheat flour
3/4 cup all-purpose flour
1 1/2 teaspoons baking powder
1/2 teaspoon salt
1/4 teaspoon ground nutmeg
1/4 teaspoon ground cinnamon
1/2 cup milk

For topping:
1/4 cup granulated sugar
2 teaspoons ground cinnamon
3 tablespoons butter, melted
Directions:
Preheat oven to 350 degrees F (180 degrees C). Lightly grease a muffin pan or line with baking cups.

In a large mixing bowl, cream together butter and sugar. Mix in the egg and vanilla extract. Stir in the flours, baking powder, salt, ground cinnamon, and ground nutmeg. Stir in the milk and mix until well blended.

Fill baking cup 2/3 full with muffin batter and bake for 18-22 minutes, or until a toothpick inserted into the center comes out clean. Allow muffins to cool in pan for 5 minutes before removing.

Whisk together cinnamon and sugar for the topping into a small bowl wide enough to fit a cupcake. Dip the top of each muffin into the melted butter and coat with cinnamon sugar mixture. Set upright on a cooling rack to set.

These muffins are best eaten the day they are made. Serve warm or room temperature.

Yield: 10-12 muffins
Source: The Pastry Affair

Wednesday, April 11, 2012

colored denim


So...remember when I said it takes me a while to get on board with some trends? Yeah, well, I have been anti-colorful denim since day one. Something about squeezing my booty into bright, dare I say neon, colored jeans just seems like a fashion disaster waiting to happen. Like, perhaps I should just frame my rear end in blinking lights while I'm at it? Or attach a Wide Load sign to my belt loops? No thank you! The standard blue, black, and white jeans are wild enough for this gal.

However, I was skimming through my Outfit Inspiration board on Pinterest recently and couldn't help but notice the abundance of photos featuring colorful denim. Gasp! When did I start liking colorful denim? I already swore that I would loathe it for all eternity...along with chambray shirts and scarves! Oh, wait, I wear chambray shirts and scarves? Like, all the time? Crap.

Turns out I love colorful denim.

Here is a sampling of some of my favorite outfits featuring colorful jeans. Looks like a colorful denim shopping trip may be in my near future...

I've been seeing tons of pale pink denim recently and it seems so versatile. You can channel an Easter egg and pair it with other pastels as in the photo above. I'm totally loving pastels right now...they feel so springy!


Or, this color looks equally cute paired with a navy blazer and stripes for a pretty look. Grey, white, black, tan...pale pink pairs well with any neutral! Plus, this shade is fairly muted. Baby steps, people. Pale pink may be a good place to start the venture into the land of colorful denim.


Or, if you want to dive into colorful denim with reckless abandon...how about hot pink? So fun for spring and summer. Plus, paired with a stack of gold bangles and a chambray shirt...this outfit was made for me!


Herre's another wild option...bright orange! I'm not sure if I'm ready to take the plunge with orange pants (I spent many long years despising the color orange, but I am slowly coming around!). However, I do love the styling of this outfit. Lesson learned: any outfit looks put together when there is a navy blazer involved.


Love these neon yellow pants, although I might have to work my way up to these babies. There's no missing those pants! This is an adorable outfit, though, paired with the leopard cardigan and chunky necklace. Cute for work.


Moving right through the rainbow, I never thought I'd like green pants. And these are GREEN! However, I am loving that leopard print skinny belt. It makes the whole outfit!


Last but not least, I'm loving this color pairing of navy with mint green. It's just such a classic look despite those sherbet-colored pants.

What do you think? Would you wear colorful denim? After reviewing all these images, I've come up with some guidelines to keep in mind:

1. Bright denim pairs well with classic pieces (navy blazers, chambray shirts, subtle animal prints).
2. When in doubt, pair with a simple white top and accessorize!
3. Keep it simple. When you've got jeans like this, who needs much else?

Okay, I'm off on a mission for colored denim.

Tuesday, April 10, 2012

weenie cookies


Happy happy birthday to my best good friend Shan!!! Today is Shan's 25th birthday and I wish I could be there to help her celebrate. However, while I can't be there in person, I am most definitely there in spirit...and in weenie cookies. :)

Fun fact about Shan: she is obsessed with all things weenie dog. Thus, since I couldn't mail her a three-layer cake, my plan B was to make some weenie cookies happen. Disclaimer: I am not an expert cookie decorator. Most of my cooking could be more accurately described as "rustic" (read: homely). Nevertheless, I was pretty proud of how these weenie cookies turned out! Here's the step by step:

Baked.
Step One: Bake up some sugar cookies. I made these Chocolate Sugar Cookies from Annie's Eats. They are super delicious although I do want to note that I had to add a LOT of extra flour to get this dough to the consistency where it could be rolled out and cut. You've been warned! Also, be sure to let the cookies cool before decorating or you'll have melted icing everywhere.

Outlined.
Step Two: Make a batch of Royal Icing. I made a half batch of this recipe from Wilton and still had plenty left over afterwards. Divide the icing into separate containers depending on how many colors you plan to make and color as desired. I used brown since weenie dogs are brown and pink for the writing since Shan loves pink! Side note: Yes, I made royal icing without a mixer. Yes, I have HUGE biceps now. I don't want to talk about it. My new hand mixer is coming soon!

Step Three: Place some of the icing in a decorating bag and carefully outline the cookies. Let dry.

Flooded.
Step Four: Thin the remaining icing until it's pourable and pour a bit into each outline. Then, use a toothpick to spread the icing to the edges and into all the nooks and crannies. Let dry for several hours.

Decorated.
Step Five: Decorate as desired! I used hot pink to write on the cookies and little blue sprinkles for the eyes. Let dry and consume!
Dog gone. Heehee!
I couldn't help it. I had to keep one for myself. He was a tasty dog! Happy birthday Shan!

Monday, April 9, 2012

peanut butter cup fluffernutter blondies

Late night snack.
Did everyone have a fabulous Easter? Dye some eggs? Eat some Peeps? Spend time with family? Good!

I spent my Easter hunkered down studying with a friend from class. And by studying I mean gossiping about school and watching videos of animals being dicks. It was grueling. ;) 

These Peanut Butter Cup Fluffernutter Blondies were there. Also, wine...and iced tea with raspberry vodka. Nothing says crunch time like sugar and booze!

In to the oven!
Fun fact about these blondes: you can make them with nothing more than a bowl and a wooden spoon! How do I know this, you ask? Well, remember when I was bitching about my broken hand mixer? Yeah, these blondies were the very thing that killed it.

I'm not bitter, though. I got some awesome blondies and a new kelly green Cuisinart hand mixer out of the deal. It was all part of a bigger plan. Yes, the bigger plan involves Peanut Butter Cup Fluffernutter Blondies and kelly green Cuisinart hand mixers. Obviously.

Hot and gooey. Yum.
My study group pal and I decided that these blondes are awesome as is but they would be exponentially more awesome with a pretzel crust. But what isn't better with a pretzel crust? I'll try to make that happen and report back ASAP. In the meantime, enjoy these. Make 'em with a hand mixer or make 'em with a wooden spoon. Either way, they are totally addictive!

Peanut Butter Cup Fluffernutter Blondies

Ingredients:
1 cup butter, room temperature
1 cup light brown sugar
1/2 cup granulated sugar
1/2 cup peanut butter
2 tsp vanilla
2 eggs
1 tsp baking soda
2 1/2 cups flour
1 tsp kosher salt
2 cups coarse chopped peanut butter cups (10.5 oz bag)
3/4 cup Marshmallow Fluff

Instructions:
Preheat oven to 350. Spray a 9×13 baking dish with cooking spray.

Cream butter and peanut butter together. Add sugars and beat until light and fluffy. On medium speed add in eggs and vanilla and mix until incorporated. Stir in your baking soda, salt and flour until just combined. Fold in your chopped peanut butter cups.

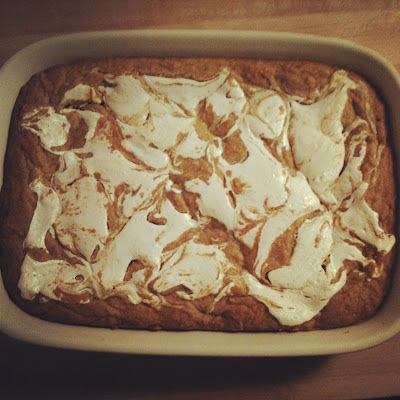
Spread the batter in your prepared pan. Drop you Fluff randomly on top of the batter and swirl in with a knife. Bake for 30-35 minutes until toothpick placed 1 inch from side comes out clean. Don’t over bake. 

Remove from oven and let cool on wire rack. Cut into squares when cooled.