
Without further adieu...the big reveal! Here's the "before" shot again to remind you of the mustard crushed velvet atrocity that was this chair. And....

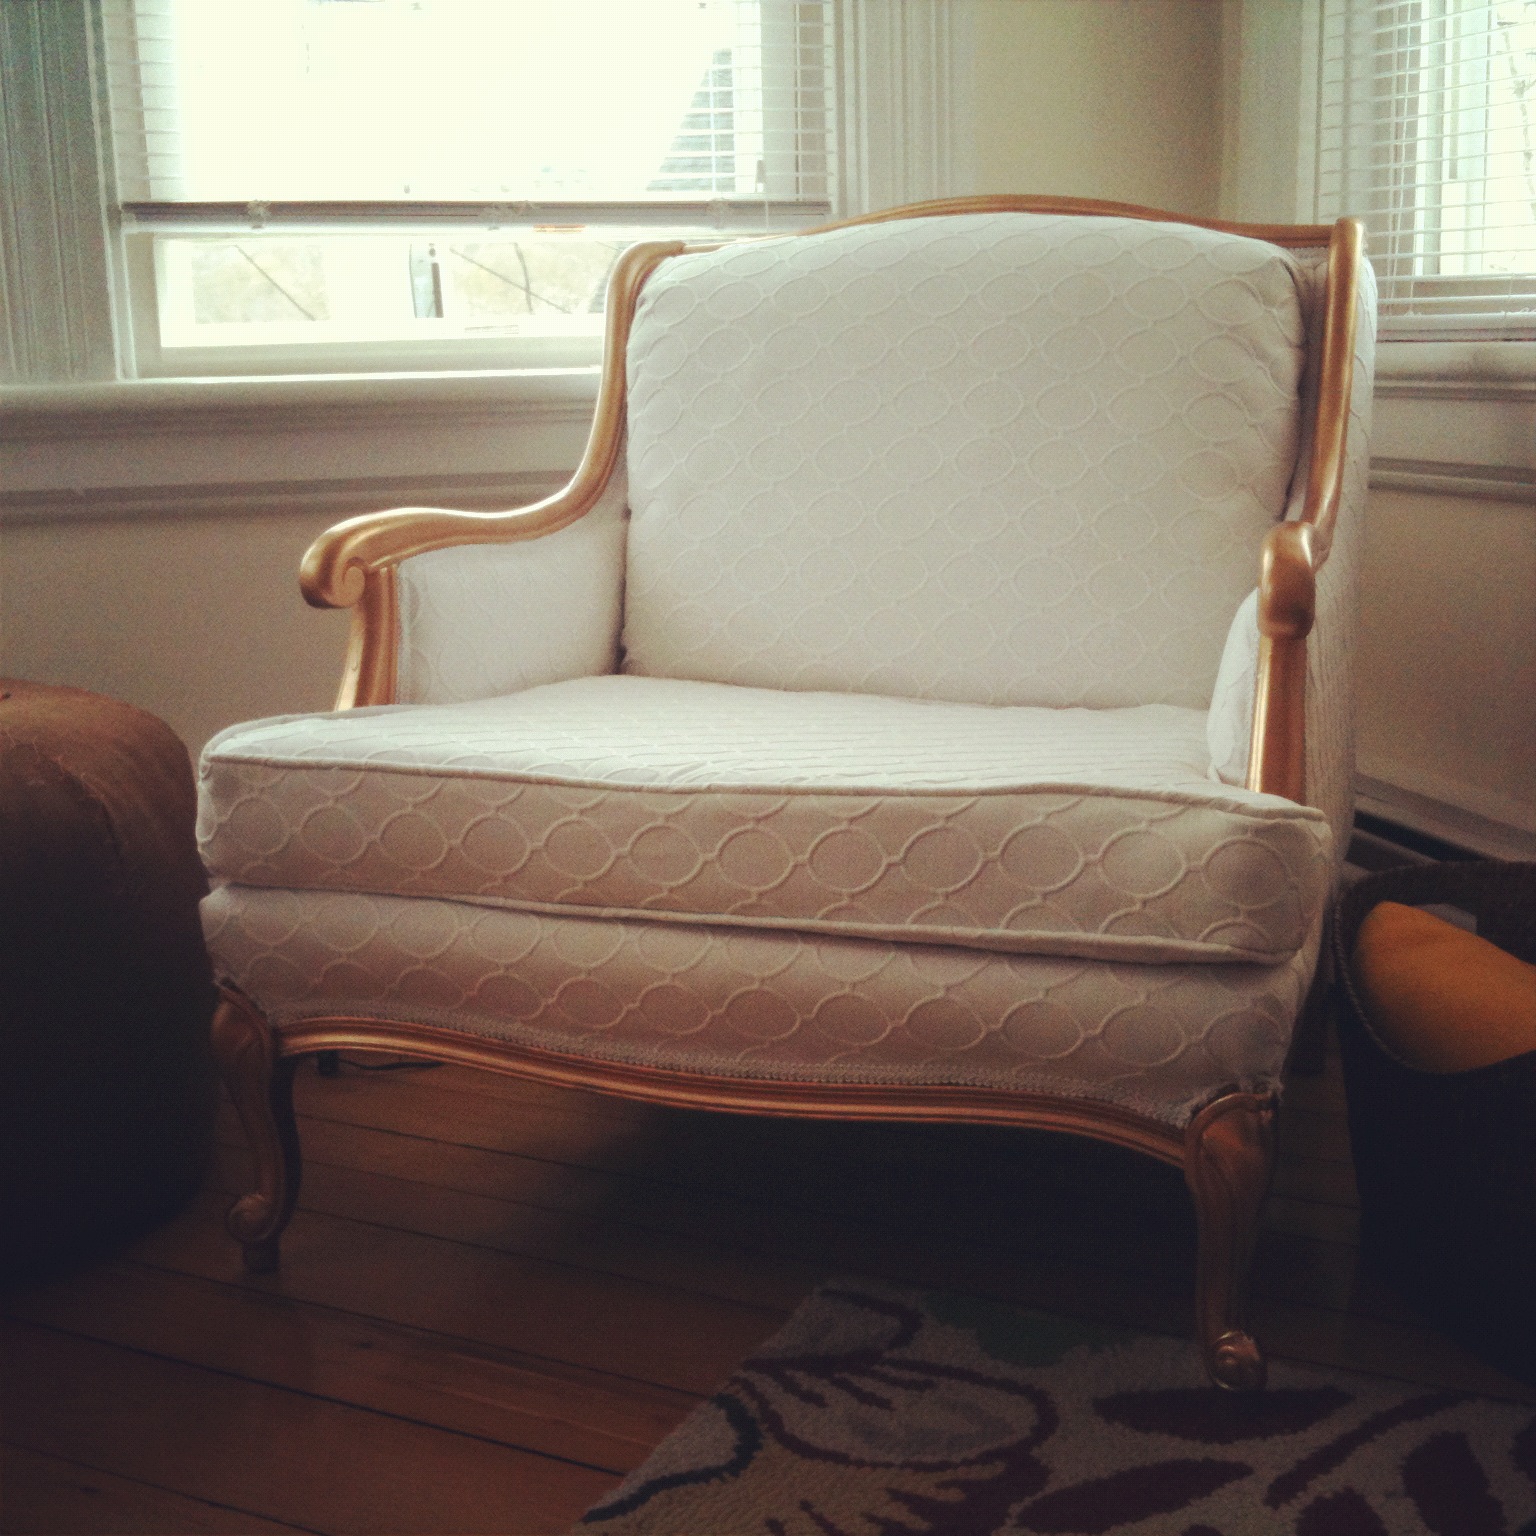
The "after"!!!! I love decorating with white so I chose a white material with a circle pattern. It was a bit of a splurge (more on that below) but totally worth it. I also refinished the frame of the chair. I liked the original wood, but it was not in the best of shape. So...gold it was! I'm so happy with the results...but it was a learning experience to be sure.
Things I've learned about upholstery:
1. Patience is a virtue. It is a loooong process. True, I worked on this chair sporadically, but it is definitely not a project you can expect to do in a day or two. Just removing the original fabric took me countless hours. I'm fairly certain those staples were from the devil. Ultimately, I ended up just ripping off most of the fabric because those staples were impossible to remove. Don't be like me.
2. Supplies are not cheap. Thank goodness the chair was cheap, because supplies began adding up quickly. The fabric alone was $40/yard from Joann's (thank goodness I had a 50% off coupon!). I found that upholstery fabric is quite a bit more expensive than most fabrics. However, I wanted to ensure that this fabric would last a while so I splurged for the better quality. On top of fabric, I also had to replace the cushion. I originally thought I'd be able to use the original but it was disintegrating and I felt like I needed a shower just touching the thing. Yuck! Anyway, cushion padding is pricey as well! Other than those two things, most other supplies were fairly inexpensive and I made a buddy at the local upholstery shop who sold me a few products for basically nothing. Score!
3. Upholstery is a "learn as you go" kind of process. I could tell you step-by-step exactly how I completed this project. But, honestly, it wouldn't be very helpful because every piece of furniture is different. My suggestion? Take boatloads of pictures as you go so you'll remember how the original was put together. I also saved and numbered every piece of fabric, trim, and stuffing as I went so that I could reference the original pieces if needed. And I was glad I did! However, I was even gladder to finally kick that skanky fabric to the curb. Yucky.
I hope this little reflection hasn't been too discouraging to those of you potential upholsterers. It was a very long, tedious process but the finished product made all the work worthwhile. Who knows? Maybe I'll take on another upholstery project one of these days. Maybe. ;)
Love the before and after pics!! Can't wait to try it out next time I get to RI. AND glad you splurged on a new cushion. Can only imagine what the old was like when working on the seat cover-yuck!! Kept imagining all the fannies that had touched the velvet I was handling-double yuck!! Good job KT. Proud of ya! Betty
ReplyDeleteI'm so proud of you, youre so patient. Looks awesome!!! Can't wait to try it out!!
ReplyDelete-Man