Tuesday, July 31, 2012

summer tomato gratin with garlic parmesan topping


We have a bounty of tomatoes here at the homestead. Like, a serious amount. A bushel. A gross. A windfall. And...I'm loving it! We have an entire table absolutely covered in tomatoes. At least six varieties ranging from your traditional Beef Stead to the more exotic Cherokee Purple. You just can't beat homegrown tomatoes. Needless to say, I'm in hog heaven. Or tomato heaven to be more exact.

I decided to put this tomato goldmine to good use and make a Tomato Gratin. This bad boy will use up at least six or seven large tomatoes. So if you have tomatoes coming out your ears, you might give this one a try. Or, if you just really love side dishes with crispy panko topping. Because, seriously? I could just eat that topping alone. For serious. We had it with BBQ chicken and it was the perfect summer meal. Enjoy!

Summer Tomato Gratin with Garlic Parmesan Topping

Ingredients:
3 lbs fresh tomatoes, pref. heirloom
2 tsp salt
2 tsp sugar
1 medium sweet onion, Hawaiian or Vidalia
1/3 cup olive oil, divided
1 cup fresh bread crumbs
1 cup panko bread crumbs
1 tsp garlic powder
salt and pepper, to taste
1 1/4 cups finely grated Parmesan cheese

Directions:
Slice tomatoes into 1/2-inch thick slices, removing the stems of the tomatoes as you slice them. Combine salt and sugar in a small bowl. Layer tomato slices into a colander, sprinkling each layer with some of the salt and sugar mixture as you work. Allow colander to stand over a bowl (or the sink) for 30 minutes to drain excess moisture from the tomatoes. Toss gently after 15 minutes.

Preheat oven to 425F.

Put 2 tbsp olive oil on the bottom of a 9×13-inch baking dish. Thinly slice onion and arrange in a single layer at the bottom of the baking dish. Arrange drained tomatoes on top of the sliced onion. Bake tomatoes and onion for 20 minutes, uncovered.

While the tomatoes bake, in a large bowl, combine fresh bread crumbs, panko bread crumbs, garlic powder and the salt and pepper. Stir to combine. Add in remaining olive oil and stir until crumbs are well-coated. Add parmesean and mix until well incorporated.

Take tomatoes out of the oven and spread crumb mixture evenly over the top of the tomato layer. Return pan to oven and bake for additional 10-15 minutes, until topping is golden brown.

Allow to cool for 10 minutes before serving. Serve warm.

Yield: 4-6 servings as a main dish, 8-10 as a side
Source: Baking Bites

Monday, July 30, 2012

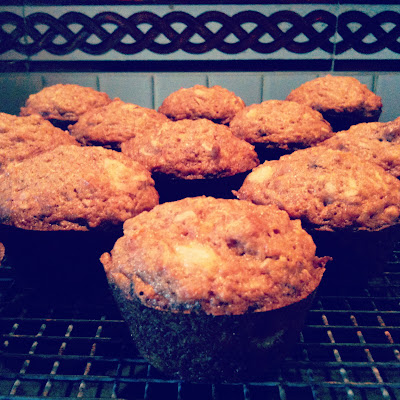
morning glory muffins


Happy Monday! How was your weekend? Mine was super busy with lots of girl time, some bridesmaid dress shopping, a BBQ, and a little flea marketing. Also, the Olympics!!! Let's talk about 'em. Anyone else confused/weirded out by that Opening Ceremony? I mean everything made sense until Lord Voldemort showed up. And then things just got progressively weirder between Mary Poppins, the kids on the glow-in-the-dark beds, and the giant baby. I mean, right? Who's with me here?

The only saving grace was Mr. Bean. Yeah, I said it. That sentence has probably never been uttered in the history of time, but you just can't beat Bean.

Anyway, I've been totally plugged in all weekend. Gymnastics, swimming, water polo. I'm a happy girl!

So here's my clunky transition to something food related. Olympians need a healthy breakfast...here's a healthy breakfast! Yikes, that was awkward. Nevertheless, these muffins are delicious and super healthy. They're full of carrots, apples, pecans, raisins, pineapple, and coconut. Basically, everything but the kitchen sink. If you've got a crisper drawer full of produce, I'd definitely suggest giving this recipe a try. It's like a carrot cake married a spice cake, went to the tropics, and had a baby. That's the best way I can explain it.

Please just make them...and then eat them and feel super healthy while you watch the Olympics. :)


The Original Morning Glory Muffins

Ingredients:
2 1/4 cups all-purpose flour
1 1/4 cups sugar
1 Tbsp cinnamon
2 tsp baking soda
1/2 tsp salt
1/2 cup shredded, sweetened coconut
3/4 cup raisins (or dried cranberries)
1 large apple, peeled and grated
1 cup (8 oz) crushed pineapple, drained
2 cups grated carrots
1/2 cup coarsely chopped pecans or walnuts
3 large eggs
1 cup vegetable oil
1 tsp vanilla extract

Directions:
Place a rack in the lower third of the oven, and preheat to 350 degrees F. Grease or line a muffin pan.

In a large bowl, whisk together the flour, sugar, cinnamon, baking soda and salt. Add the coconut, raisins, apple, pineapple, carrots, and nuts. Stir to combine.

In a separate bowl, whisk the eggs with the oil and vanilla. Pour into the bowl with the dry ingredients, and blend well.

Spoon the batter into muffin pan, filling each to the brim. Bake for 35 minutes or until a toothpick inserted into the middle comes out clean.

Cool muffins in the pan for 10 minutes, then turn out onto a rack to finish cooling.

Yield: ~20 muffins

Friday, July 27, 2012

having fun


Gotta love this quote. Hemingway really knew his shiz. I realized today that my time in Kansas-land is drawing to a close. I have barely a week and a half left here with my friends and family. It's bittersweet, leaving everyone I love but I am also looking forward to a month left of my summer in Rhode Island. Plenty of time for some sand, sun, and plenty of boozy drinks before I have to transition back into school mode. I've been focusing on making the most of these last several days in Kansas and basically having a buttload of fun. Yes, buttload is a technical term. Some things I've done for fun this week...

1. Momma K made these White Chicken Enchiladas from Pinterest earlier this week and we had a little dinner fiesta. I've been eating the leftovers for every meal. Delish!

2. I've been reading this book. It's part of the common reading program at URI this year so it's not entirely for fun but I have to say that I'm really enjoying this book. It's inspiring, real, and heart-wrenching. If you're looking for a book that's a little more substantial than 50 Shades, I'd suggest this one.

3. Look at this picture. Just look at it. Disgusting. Posey cat is so cute I could just die right now. I'm afraid I've been taking a ridiculous amount of cat pictures lately. Whatevs, don't judge.


4. I'm officially obsessed with The Mentalist. Like, spent-a-whole-day-watching-a-marathon-obsessed. I wish I could read people like Patrick Jane. Also, I would like to find a man who can rock a vest with such swagger. (sigh)

5. Can we all just agree that this season of Project Runway has an ah-may-zing group of contestants? I was so impressed with last night's candy challenge. I would without question wear that stained glass rock candy dress. Gorgeous!

6. I've been baking up a storm these last few days! Stay tuned for the most ultimate chocolate chip cookies ever. Ever, ever, ever? EVER! Also, salted caramel brownies and nutella-filled muffins. Have I got your attention yet?

7. This weekend is going to be filled with BBQ's, girl time, and shopping. And I cannot wait.

Hope you all have some great weekend plans ahead! Happy Friday!

Thursday, July 26, 2012

blueberries and cream pie


So I was totally on top of the fact that July is National Ice Cream Month. I mean, obviously. Ice cream is only one of my favorite foods. However, did you know July is also National Blueberry Month? Cha! I had no clue until yesterday. Yup, there are a mere five days left of July and I'm just now jumping on the blueberry month bandwagon. Goes to show where my food priorities lie.

I like blueberries all right. I mean, I eat them every now and then. But my mom and brother are blueberry freaks. My mom ALWAYS has a container of blueberries in the fridge. And my brother? Anytime he requests a specific baked good or dessert, nine times out of ten it's bound to be blueberry something. Lemon blueberry scones, blueberry muffins, even blueberry cookies. I suppose there are worse things to love...


So, since I have a couple blueberry-aholics on hand and blueberries are cheap and in season, I made this blueberry pie. I figured everyone else would like it, even if I wasn't in love with it. Blueberries plus custard plus streusel topping. I mean, that seems like a recipe for success. Plus, you all know my feelings toward streusel. You put streusel on a leather shoe and I'll eat a slice...or two.

The result: this is definitely one of my top three favorite pies ever. Who saw that coming? Not I. Guess I've finally embraced the blueberry. The secret? Put it in a pie crust and cover it in streusel. Devour. Contemplate how many antioxidants you are consuming to avoid thinking about the mass quantities of butter and sugar that are also involved. Enjoy. :)


Blueberries and Cream Pie

Ingredients:
1 pie crust, store-bought or homemade
1 large egg mixed with 1 Tbsp water (for egg wash)

Filling:
3 cups blueberries
1 cup sugar
1/3 cup all purpose flour
2 large eggs, at room temperature
1/2 cup sour cream
1/2 tsp vanilla extract

Crumb Topping:
2 1/2 Tbsp brown sugar
2 Tbsp sugar
1/2 tsp ground cinnamon
pinch ground nutmeg (about 1/16th tsp)
1/4 cup unsalted butter, melted
1/2 cup plus 2 1/2 Tbsp all purpose flour

Directions:
Preheat over to 350 degrees.

Roll the dough into the pie plate (a 9-inch pie plate) and press it into the insides of the pie plate.
Crimp the edges of the pie or take a fork and crimp the edges.

Place the pie crust in the refrigerator while you work on the filling. In a bowl of a stand mixer with the paddle attachment, mix together the sugar and flour. Add in the sour cream, eggs and vanilla extract and mix until combined. Take the pie out of the refrigerator and put the blueberries on the bottom of the crust. Pour the filling over the blueberries and spread it out.

Now make the crumb topping. Mix together the sugar, brown sugar, ground cinnamon and ground nutmeg. Pour the melted unsalted butter into the bowl and mix everything together. Add in the flour and mix until the ingredients form a crumble topping. Crumble the crumb topping over the pie.

Mix together 1 large egg and a Tbsp of water and brush over the edge of the crust. Bake the pie at 350 degrees for 50-55 minutes. Let the pie cool before cutting into slices.

Yield: one 9-inch pie

Wednesday, July 25, 2012

diy growth chart


So I went to a baby shower last weekend. I'm not so good at baby showers. I mean, I sit there politely and eat the food and hold the babies and whatnot. But I seriously SUCK at talking babies. You know, like feeding schedules and breastfeeding vs. bottle feeding and colic and diaper changing and husbands and stretch marks. That type of subject matter is NOT my forte. As soon as baby talk begins I take one of two tacts.

Tactic #1: Sit in polite silence and feign interest in the apparent nuances between babies' eating/sleeping/crapping habits, nodding attentively so as not to reveal that I'm really contemplating my next date night outfit or whether it's appropriate to make mixed drinks at a baby shower or why I'm not more tan or something important like that.

Tactic #2: Exercise my role as token childless guest and insert my own personal brand of inappropriate jokes and witty comments. I should mention that this is the tactic I usually choose. Or, even better, if there is another childless guest, I engage in some clever banter to distract us both from a diaper discussion.

However, inappropriate jokes and wit are rarely, if ever, appreciated in the world of baby showers. It's a crying shame really. Everything is so much better with inappropriate jokes and wit. I just can't win.


One thing I am good at, though? Gifts. DIY gifts, to be exact. Like these DIY growth chart kits I made for my friend Maudie. They were a huge hit...despite my otherwise inappropriate and witty behavior.

Here's what you'll need for each growth chart:

  • two yards of jute webbing (I found mine at an upholstery shop for $1.25/yard)
  • permanent marker
  • ruler
  • one grommet
  • safety pins
  • small tags
Directions:
1. Use ruler to mark off inches and feet on jute webbing. Use permanent marker to number markings along left side of webbing. A stencil may be useful for this but I didn't have one available so I just freehanded it.

2. Write name along right side of jute webbing toward top. Again, a stencil might be useful here.

3. Use grommet tool to insert grommet at top of growth chart.

4. Package growth chart with safety pins and small tags for recording date and height.

Check out the original source, Whipper Berry, for more pictures of this simple gift idea.

Tuesday, July 24, 2012

olive cheese bread


Yesterday, I shared a super easy chicken dish that is delicious and healthy. That was me being the angel on your shoulder. Just imagine me perched there saying...make this roasted chicken! Serve it with veggies and a side of fruit! Be virtuous!

Today, I have switched shoulders. Oh ho ho, have I ever switched shoulders. Today, I'm going to suggest you make that chicken and the veggies, too. But serve them with a big old slab of Olive Cheese Bread. I'm talking carbs loaded down with cheese and butter and mayo...plus a bunch of olives for good measure. But seriously, just like a lot of carbs and fats. You feeling me?

This is not the kind of bread that you serve on a regular basis. Nor is this the kind of bread that you should eat much of...although you WILL be tempted to. This here is special occasion bread. Not because it's fancy or complicated to make. No sir. No ma'am. It's special occasion bread because you will probably want to smash this loaf of gooey goodness right into your pie hole. It's crusty and cheesy and olive-y and every other wondrous adjective you can conjure up. And you just shouldn't do that every Tuesday night...unless you are prepared to trade in all your skinny jeans for sweat pants. On second thought, that doesn't sound like a bad idea.

So make this bread. Make it with something healthy like roast chicken and veggies so you don't feel like a total Paula Deen after you dominate this bread. Just speaking from experience here folks. Now go get 'em!

Olive Cheese Bread

Ingredients:
1 loaf french bread
6 ounces, weight pimiento-stuffed green olives
6 ounces, weight black olives
2 stalks green onions (scallions)
1 stick butter, room temperature
1/2 cup mayonnaise
3/4 pounds monterey jack cheese, grated

Directions:
Roughly chop both black olives and pimiento-stuffed green olives. Slice green onions into thin pieces.

Combine butter, mayonnaise, cheese, olives and green onions in a mixing bowl. Stir together until thoroughly combined. Spread mixture onto French bread that has been sliced lengthwise. Bake at 325ºF for 25 to 30 minutes or until cheese is melted and browning.

Yield: 12 servings

Monday, July 23, 2012

buttermilk roast chicken


Happy Monday! Hope you all had a great weekend. Mine was a total whirlwind between a quick trip to Kansas City, a baby shower, and a night out on the town in Wichita. But today I don't want to talk about any of that. By Sunday, all I was capable of was a whole lotta napping and a long night of TV, which worked out perfectly because there were sooo many good shows on last night! So let's talk TV...

1. The Bachelorette finale: Thank the good lord Emily chose Jef! After all the dramatic previews they kept running, I was pleasantly surprised with the outcome. Good work Emily. Girls got a good head on her shoulders. Now we all just need to book a group trip to Utah to find our own personal Jef. (sigh)

2. Next Food Network Star finale: Another satisfactory finale episode with Justin crowned the official next Food Network star. He's like Alton Brown 2.0 and that is totally something I can get behind.

3. The Newsroom: This show seriously gets better every single week. Like after every episode I think, this show just cannot get any better...and then it does. If you're not watching it already, you should be.

That was a whole lotta TV for one girl to take in one evening. Yeesh. I suppose everyone needs a lazy Sunday every now and then though.

Speaking of lazy Sundays, here's the perfect recipe for a lazy Sunday...or a week night for that matter. This is perhaps the easiest chicken dish I've ever made. The chicken is soaked in a buttermilk brine the night before and then simply roasted in the oven. Easy peasy. Something about the buttermilk does beautiful things to this chicken. It's so simple but so, so good. Make it on one of those days when you simply can't be pried away from copious amounts of trash TV. No judgment. :)

Buttermilk Roast Chicken


Ingredients:
2 cups buttermilk
5 garlic cloves, peeled and smashed
1 Tbsp table salt
1 Tbsp granulated sugar
1 1/2 tsp paprika, plus extra for sprinkling
Lots of freshly ground black pepper
2 1/2 to 3 pounds chicken parts (we used all legs)
Drizzle of olive oil
Flaked or coarse sea salt, to finish

Directions:
Whisk buttermilk with garlic, table salt, sugar, paprika and lots of freshly ground black pepper in a bowl. Place chicken parts in a gallon-sized freezer bag (or lidded container) and pour buttermilk brine over them, then swish it around so that all parts are covered. Refrigerate for at least 2 but preferably 24 and up to 48 hours.

When ready to roast, preheat oven to 425 degrees. Remove chicken from buttermilk brine and arrange in baking dish. Drizzle lightly with olive oil, then sprinkle with additional paprika and sea salt to taste. Roast for 30 to 35 minutes (for legs; approximately 35 to 40 for breasts), until brown and a bit scorched in spots. Serve immediately.

Yield: 6 servings

Friday, July 20, 2012

runway recap and a posey


First things first, look at how precious my baby kitty is!!! Every time I look at that picture above I just die a little death from so much cuteness. Ahhh!!! And then I look at the picture below and I die again because Posey and I share a mutual love of online shopping AND bubble necklaces. What?!? It's a match made in heaven...clearly.


Okay, onto more serious matters. First, a belated recap of The Bachelorette. I'll spare you the long drawn-out discussion because a) I'm three days late and b) it will basically restate everything I've been saying all season long. Here goes...

Ryan is slightly obnoxious but mostly harmless. Kalen is basically Ryan Phillippe from Cruel Intentions but without the part where he discovers that he has a soul. Sean is perfection, pure and simple. And Emily grows on me a little more every week. I particularly loved the part about her being a cat lady...for obvious reasons.

Can't wait for the season finale on Sunday. Looks like a nail biter!

And, the last order of business, last night's season opener of Project Runway. So excited for the season already. I can already tell that there are some fierce divas, some criers, and some major Drama with a capital D! Woo hoo!

Hope everyone has some exciting weekend plans. I'll be making a quick trip up to KC for a baby shower and then back to Wichita for a night on the town. Have a great weekend!

Thursday, July 19, 2012

blueberry muffin bread


I've been on a serious blueberry kick lately. You'll see. This is only the beginning, people. But this is a good start, no? Actually, I bet you're looking at the title of this post saying to yourself, that Katy, what a fool. Something is either a muffin or it is bread. Not both at the same time! What nonsense is this? Next thing you know, I'll be showing up with a cupcake cake or a cobbler pie. Wait. Actually, both of those things sound awesome. Those need to be added to the ol' TO DO list.

Anyway, this is no mistake. This is actual bonafide Blueberry Muffin Bread. On first glance, it certainly looks like your typical blueberry bread, but it's more. So much more. It has an amazing streusel topping just like every good blueberry muffin should have. Remember those boxed mixes for blueberry muffins? The kind that came with a can of blueberry-ish substance and a packet of streusel. It's like that...only a million times better because the blueberries are fresh and the streusel is made with real butter. Devine.

On a totally unrelated note, I just want to remind everyone that the new season of Project Runway starts tonight! If you thought I had a lot to say about The Bachelorette, you ain't seen nothing yet. Hope you all tune in tonight and we'll recap tomorrow. Auf wiedersehen!

Blueberry Muffin Bread

Ingredients:
2 1/2 cups whole wheat pastry flour
1 cup all-purpose flour
1 1/2 teaspoons baking powder
1 teaspoon baking soda
1 teaspoon cinnamon
1/4 teaspoon salt
2 large eggs
2/3 cup brown sugar
1/4 cup granulated sugar
2 teaspoons vanilla extract
2/3 cup milk
1/2 cup butter, melted and cooled
1 1/2 cups fresh blueberries, tossed in a spoonful of cornstarch

Streusel:
1/2 cup loosely packed brown sugar
1/2 cup all-purpose flour
1/4 teaspoon cinnamon
pinch of salt
1/4 cup unsalted butter, softened
1 tablespoon milk

Directions:
Preheat oven to 350 degrees F. Spray a loaf pan liberally with non-stick spray or grease with butter. In a bowl, mix together flour, baking soda, salt, cinnamon and baking powder, then set aside.

In a large bowl, whisk egg and sugar together until smooth. Whisk in vanilla extract, then add in milk and mix until combined. Add in dry ingredients slowing, mixing with a spoon until batter comes together. Batter will be thick. Add in melted butter and mix until incorporated, then stir in blueberries.

Mix together the streusel ingredients, bring it all together with your hands. Sprinkle over the bread evenly. Bake for 50-55 minutes, or until bread is golden and a toothpick inserted in the center comes out clean. Serve warm with butter!

Yield: one 9x5 loaf
Source: How Sweet It Is

Wednesday, July 18, 2012

j.crew bubble necklace

source: j.crew

Today, I want to talk jewelry. Not jewelry in general, but one piece in particular. I'm sure you've seen it. It's everywhere these days. Specifically, it's heading this post. It's the J.Crew bubble necklace. Have you seen it? Are you on the bubble necklace bandwagon yet? I want to be so badly. There's only one thing standing in my way...that pesky $150 price tag. Wowza, not sure I can justify $150 for a piece of costume jewelry. Particularly on a grad student salary.

However, let's take a moment to appreciate the glory that is the bubble necklace. According to the J.Crew website, this necklace is an icon. An ICON, people! Not sure I buy into that. But it sure is purty, ain't it?

Here's the specs:
  • 26" with a 2" extender
  • gold plated chain
  • available in turquoise, black, navy, pink, and white
  • a mere $150
I am absolutely in love with this necklace primarily because it makes such a statement. Add this to any outfit and you will automatically look put together. Well, except a sweat suit. Don't wear this necklace with a sweat suit. Thanks.

I've scoured Pinterest for a few of my favorite "bubble necklace outfits." Check 'em out.

source: pinterest
This is how I envision myself wearing this necklace most often. Paired with a nice button-down and dress pants or a pencil skirt for work. It makes even a boring work outfit look fashionable.

source: fashion worship
I've had this outfit pinned for years, yes years, now. I love the turquoise/kelly green combo. Plus, love that this bold, statement necklace can look so perfect paired with such a low-key weekend outfit.

source: futilish
Finally, thanks to Futilish for putting together this awesome bubble necklace montage. As you can see, this necklace can go from dressy to casual and back again. I just can't decide which look is my favorite! Love the black one paired with the leopard skirt and military jacket. So classic. But, then again, there's just something so perfect about all white paired with a chambray shirt. (sigh) However, the hot pink/turquoise look is so fun, too. That's it, I refuse to pick a favorite.

The worst thing about getting a bubble necklace would be choosing which color to get. They're all so perfect. However, I do have a little secret...hime diy. They make awesome replications of the original bubble necklace, but with two major differences. First, they have a huge selection of colors and sizes. Like, seriously huge. I've been debating for days which necklace to add to my shopping cart. It's becoming a problem. Second, they are super cheap! These replications range anywhere from $19 to $29, which means that you could buy five, yes FIVE, replication bubble necklaces for the cost of one real one. Think about it, man!

Yeah, the replications are probably no where near the quality of the j.crew original, but they're a good option for the money. One of these day, though, you mark my words. The bubble will be mine!

Happy Wednesday!

Tuesday, July 17, 2012

spicy stewed beef with creamy cheddar grits


So normally today is my day to gossip about The Bachelorette. And I'm guessing I would have plenty to discuss seeing as the reunion episode was last night. However, because I am SUCH a good friend, I am waiting to watch it with my friend Shan on Thursday night. So please, no spoilers anyone! We'll catch up first thing Friday morning, mmmk?

In other news, let's talk beef and grits. Fun fact: I never made grits until I moved to New England. Seems a bit backwards, right? But now that I've made them, I can't stop making them! They are the perfect side for any and all meat dishes.

Plus, leftover grits are basically the bomb diggity topped with an egg, over easy. I'm salivating just thinking about it. It's one of my favorite single girl dinners. You know, the things I can eat now that would never qualify as dinner for an actual family. Like when I eat cheese and crackers and wine for every meal. Or dip. Or pie. I do what I want, y'all.

Anywho, this time I made cheesy grits for an actual family dinner and topped them with this spicy stewed beef. I halved the recipe and it still made plenty for four of us. Careful, though, the "spicy" in the title of this recipe is not just there for looks. This is a spicy dish! If you don't like spice, you might consider cutting down on the chipotle in adobo. Just a thought. Other than that, this recipe is super easy, straight-forward, and stick-to-your-ribs home cooking. Not a single girl dinner. Real family dinner food. Enjoy!

Spicy Stewed Beef with Creamy Cheddar Grits

Ingredients:
2 Tbsp canola oil
2 Tbsp butter
3 pounds stew meat or diced chuck roast
1 can (11 ounces) chipotle peppers in adobo sauce
4 cups low-sodium beef broth, more if needed
5 cloves minced garlic
1 Tbsp cumin
2 tsp chili powder
1 small onion, diced
1 whole red bell pepper
2 cups stone ground grits
3 cups low sodium chicken (or beef) broth
1 1/2 cups water
1 cup half-and-half
1 cup grated cheddar cheese

Directions:
To make the meat, heat 1 tablespoon oil and 1 tablespoon butter in a large pot over high heat. Throw in stew meat and brown for 1 minute, then add chipotle peppers, beef broth, garlic, cumin, and chili powder. Stir, then bring to a boil. Reduce the heat to low, then cover and simmer for 2 1/2 to 3 hours, or until the meat is fall-apart tender and the liquid is thick. (Watch the meat occasionally and add more beef broth as needed.)

In the last hour of cooking time, make the grits: Heat remaining 1 tablespoon of both oil and butter. Add diced onion and bell pepper and cook for five minutes or so. Pour in grits, then add chicken (or beef) broth and water. Stir, then bring to a boil . Reduce the heat to low, then cover and cook for 30 minutes, stirring occasionally. After 30 minutes, add half-and-half. Cook for another 20 to 30 minutes, or until grits are tender. Remove from heat and stir in grated cheese.

Serve pile of grits with stewed meat (liquid and all) over the top. Sprinkle on sliced green onion for color.

Yield: 12 servings
Source: barely adapted from The Pioneer Woman

Monday, July 16, 2012

nutella crescent bites


Hey there y'all! How was your weekend? I had a fabulous time in Dallas. I got to see Jersey Boys, had some amazing food, visited the Dallas World Aquarium, and had some good ol' quality time with the little sis.

It's definitely good to be back in Kansasland, though. I'm afraid I can't deal with much more of this Midwest heat. I'm about to melt! My plan is to hibernate indoors for the next two weeks until I head back to Rhode Island. Do some baking, some reading, some crafting, and some more baking. Should provide some good material for the ol' blog! :)


Okay, onto the butter and sugar I promised you last Friday. I aim to please! :)

Here's a pet peeve. Don't you hate it when you pin something and then, when you go to look at the link later, you realize that it's just an image that goes nowhere? That happened to me with these Nutella Crescent Bites. I had crescents. I had Nutella. But the link was nonexistent. Bummer.

So, rather than despair, I made these Nutella Crescent Bites out of my own ingenuity and know-how. Luckily, they were super easy....and delicious. With crescent dough and Nutella, how could they be anything but amazing?

Nutella Crescent Bites

Ingredients:
1 tube crescent rolls or crescent dough
12 Tbsp Nutella
1 Tbsp butter
cinnamon for sprinkling
sugar for sprinkling

Directions:
Preheat the oven to 350 degrees F.

Separate crescent dough into four rectangles. Cut each rectangle into three smaller pieces as seen in the top left image above.

Put approximately one tablespoon Nutella on each rectangle. Fold in half and crimp edges with fork.

Melt butter. Brush tops of each crescent bite with butter and sprinkle with cinnamon and sugar.

Bake crescent bites according to package directions, approximately 15 minutes. Serve warm.


Yield: 12 bites
Source: inspired by Pinterest

Friday, July 13, 2012

dallas bound


Happy Friday folks! As you read this, I am cruising down to Dallas, Texas to visit my baby sister, who is interning down there for the summer. Plans for the weekend include lots of gossiping, a food and wine festival, a little exploring, and a musical I've been dying to see, Jersey Boys. I'm super pumped to say the least. :)

Some things on my mind lately:

1. I'm newly obsessed with The Mentalist. Simon Baker is some beautiful man candy. And he rocks a mean vest. Fact.

2. Is anyone else nervous/insanely excited for the Bachelorette reunion? Kalen? Ryan? Chris? Yayyyy!

3. Reupholstery is not nearly as bad as I remembered. Some Nicki Minaj Pandora station, some Diet Dr. Pepper, and a buddy and the staples practically remove themselves! Okay, it's not that easy. I mean, I have a tiny finger blister and maybe tetanus...but it's all part of the experience, right?

4. My new baby kitteh, Posey, is disturbingly, disgustingly, despicably adorable. I'm officially a cat lady. Ugh. I love it.

5. My next DIY jewelry project. So cute and sooo easy. This is happening immediately.

That's all for now. Hope you all have some exciting weekend plans. I'll be back Monday with my usual butter and sugar laden posts. Now I've got packing to do!

Thursday, July 12, 2012

diy braided necklace

Good morning folks! Apologies for the belated post today, but I am pleased to announce that I have a post for you that does NOT contain butter or sugar! I know. Crazy, right? A gal needs a little break from butter and sugar every once in a blue moon. Plus, I made something pretty! :)

My friend, Maudie, and I were thrift shopping last weekend when I found the necklace below. I really loved the chunky chain link and the heavy weight of the necklace. But more than that? I really really loved that it was three dollars. Sold!

I just had to figure out what to do with it. Naturally, I went to Pinterest, where I found this DIY necklace and this DIY necklace and this really really ridiculously expensive necklace, all of which led to me rushing out to the nearest fabric store to stock up on embroidery thread.

Here's the step by step:


Step One: Gather your supplies. All you need is a chain link necklace, any color and length, and embroidery thread, any color. I know I have six packs of thread pictured here. I really didn't know how many I would need. I ended up using three total, two ivory and one peach, and it was the perfect amount for this shorter chain. Just FYI.


Step Two: Gather your thread together. I took each pack and cut it into eight equal lengths and bundled all three packs (so 24 total pieces of thread) together. This will really depend on the length and size of your chain though so use your best judgment. Then tie your thread around one end of the necklace.


Step Three: (not pictured because I got too excited to take pictures) Divide the thread into two bundles and braid the bundles through the chain link. You can kinda see in the picture above how I did this.

Alternately, you could also just leave the bundle as one and loop it through the chain link for a simpler look.

Step Four: Knot the excess thread at the end of the necklace and cut off remaining thread. Ta Da! That's it!

Mine took me maybe twenty minutes and cost me a total of $4. Not bad, huh? I love my neutral colors but I would like to do another with hot pink or neon yellow thread. Cute, cheap, easy...this is my kind of craft!

Wednesday, July 11, 2012

coconut pineapple banana bread and a kitty!


Happy hump day folks! I have a new recipe for you today...but first I want to distract you with cute kitty pictures. Her name is Posey. Isn't that name just so cute you could gag? My dad picked it. It's actually short for Buster Posey, a baseball player for the San Francisco Giants. Considerably less cute, I know. But I bet Buster Posey would be honored to know this little lady was named after him. :)

Posey showed up at our door yesterday afternoon and has been following us around ever since. Despite a border collie that desperately wants to eat her, Posey is totally fearless. She walks around like a straight boss. Just look at that face. It has gangsta written all over it.

Okay, enough kitten talk for now...although I can't promise that there won't be more pictures in the next few days. Let's talk banana bread, shall we?


You can never have too many banana bread recipes. Chocolate banana bread, peanut butter banana bread, plain ol' banana bread. But it's summa time! So naturally I added in some coconut and some pineapple. It's like a pina colada poured into a loaf of banana bread! Actually, that sounds gross...scratch that. It's just summery banana bread, okay?

Coconut Pineapple Banana Bread

Ingredients:
2 large or 3 small very ripe bananas
1/3 cup crushed pineapple, drained
1/3 cup canola oil
1/2 cup sugar
1 cup all-purpose flour
1 cup white whole wheat flour
1 teaspoon baking soda
1 teaspoon ground cinnamon
1/2 teaspoon salt
generous pinch of ground ginger
pinch of allspice
1/2 cup sweetened shredded coconut

Directions:
Preheat the oven to 350 degrees F. Lightly grease and flour a 9 x 5-inch loaf pan.

In a large mixing bowl, mash the bananas really well. Add the sugar, pineapple, and oil and whisk briskly to incorporate.

Sift in the flour, baking soda, spices, and salt. Use a wooden spoon to mix until the wet and dry ingredients are just combined. Fold in the coconut.

Transfer the batter to the prepared pan and sprinkle with extra sugar if you’d like. Bake for 45 to 50 minutes. The top should be lightly browned and a knife inserted through the center should come out clean.

Remove from the oven and let cool for 20 minutes before transferring out of a pan and onto a wire rack to cool completely.

Yield: one 9x5 loaf
Source: adapted from Joy the Baker

Tuesday, July 10, 2012

fat elvis ice cream


I brought you something more seasonally appropriate today. But first, The Bachelorette? Let's talk about it. Specifically, "the rose heard 'round the world." Did you hear it too? The audible gasps and shouts of "what the eff?!?" that arose from women across the country when Emily chose Arie for the final rose. And then the subsequent mad dash as single women everywhere raced to their computers to sign up for the next season of The Bachelor in the desperate hope that Sean might be that guy.

If you've been around the ol' blog throughout this season, you know that I am an avid Sean fan...and an equally (if not more so) Arie disliker. Thus, I absolutely joined in with the chorus of stupefied women who watched Emily kick Sean to the curb. As usual, I have a few theories on this shocking turn of events.

Theory #1: The crack team of producers for The Bachelor already determined that Sean would make for the ultimate Bachelor and forced Emily to kick him off now. So sad for Emily but she's better off with Jef anyway.

Theory #2: Arie is an alien life form and his disgusting face-eating kisses are not kisses at all but, in fact, a very highly advanced form of mind control. Yes, this scenario is rather unlikely but I want to explore all possible options here.

Theory #3: Emily already knows that Jef is her dream guy and just needed to fill a spot for the finale. She clearly loves her face-sucking time with Arie so she kept him around for the fun of it. Whatevs, I won't hate on that.

Again, I'm just exploring all possible avenues here. Because clearly Emily, of her own free will, did not choose Arie over Sean. My Katy brain cannot comprehend such nonsense. Either way, though, I'm just happy that Jef is still in the game. Team Jef!


Okay, on to food! As you may or may not know, July is National Ice Cream Month! Yayayay! Ice cream just so happens to be one of my greatest weaknesses so I guess you could say that I really love July. :)

Today I bring you Fat Elvis ice cream. An ingenious combination of banana, peanut butter, chocolate fudge, and peanut butter cups. Is it possible to even imagine a more delicious ice cream??? Not in my brain! Head over to Oh My Veggies for the full recipe. And hurry! We're already ten days in to the month so we have some lost time to make up!

Enjoy!

Monday, July 9, 2012

hardcore chili


Before you say anything, the answer is yes. Yes, I do know it's July. Yes, I am aware that the average temperature lately has been approximately 1,374 degrees Fahrenheit. Yes, I also understand that chili is cold weather food. But hear me out, people.

First, we are officially experiencing a cold spell here in Kansasland. Today, the high is a mere 89 degrees. That's practically sweater weather compared to what we've been dealing with lately!

Second, I have solemnly sworn a blogging oath to bring you the best content humanly possible. And this here chili? Well, it's quite simply the best.

Listen, maybe chili doesn't sound so appealing now. Maybe all you want now is a slice of watermelon and a pitcher of sangria. I get it. I really do. But put this recipe in your back pocket for some chilly Sunday in October. Then....then you'll thank me.

As I've mentioned before, I've been on a lifelong quest to find the ultimate chili recipe. My mom's chili is pretty amazing and it's been an arduous journey to find a chili that tops hers. It's required lots and lots of chili-eating on my part. I'm not complaining, mind you. Just a hazard of the job. Anywho, this chili officially dominates all other chilis.

Mom's chili is still my favorite go-to chili recipe. It's quick, easy, and delicious. This chili, on the other hand, is not the kind of chili you throw together on a week night. It requires a little bit of time and forethought. There's bean soaking, there's steak trimming, there's slow braising. But I promise you, it's worth every second. This right here is chili nirvana.

This is mere speculation, but I have a hunch that this is the kind of chili that makes a man fall in love. That's some serious power right there. Use it wisely.

I'll be back with something more seasonal tomorrow. Happy Monday!

Favorite Chili

Ingredients:
½ pound dried pinto beans (about 1 cup), rinsed and picked over
1/2 cup chili powder
1/4 tsp cayenne
3 Tbsp cornmeal
2 tsp dried oregano
2 tsp ground cumin
2 tsp cocoa powder
2½ cups chicken broth, divided
2 medium onions, cut into ¾-inch pieces (about 2 cups)
3 jalapeño peppers, stems and seeds removed, cut into ½-inch pieces
3 tablespoons vegetable oil, divided
4 garlic cloves, minced
1 (14.5-ounce) can diced tomatoes
2 tsp light molasses
3½ pounds blade steak, trimmed of gristle and cut into ½-inch pieces (see note)
1 (12-ounce) bottle milk lager, such as Budweiser

Directions:
Combine 3 tablespoons salt, 4 quarts (16 cups) water, and beans in a large Dutch oven and bring to a boil over high heat. Remove the pot from heat, cover, and let stand 1 hour. Drain and rinse beans well. Rinse out Dutch oven.

Mix chili powder, cayenne, cornmeal, oregano, cumin, cocoa, and ½ teaspoon salt in a small bowl. Add ½ cup broth until a smooth paste forms. Dice the onions and jalapeños.

Heat 1 tablespoon of vegetable oil in the large Dutch oven over medium-high heat. Add the onions and jalapeños and cook, stirring occasionally, until the moisture has evaporated and the vegetables are softened, 7 to 9 minutes. Add the garlic and cook until fragrant, about 1 minute. Add the chili paste, tomatoes, and molasses; stir until chili paste is thoroughly combined. Add the remaining 2 cups chicken broth and the drained beans; bring to a boil, then reduce heat to a simmer.

Meanwhile, heat 1 tablespoon of the vegetable oil in the 12-inch skillet over medium-high heat until shimmering. Pat the beef dry with paper towels and sprinkle with 1 teaspoon salt. Add half of the beef to the skillet and cook until browned on all sides, about 10 minutes. Using a slotted spoon, transfer the meat to the Dutch oven. Pour off any liquid in the skillet into the sink and return to the heat. Add ½ of the bottle of lager to the skillet, scraping the bottom of the pan to loosen any browned bits, and bring to a simmer. Transfer the lager to the Dutch oven. Repeat with the remaining tablespoon of oil, steak, and lager. Once the last addition of lager has been added to the Dutch oven, stir to combine and return the mixture to a simmer.

Cover the pot and transfer to the oven. Cook until the meat and beans are fully tender, 1½ to 2 hours. Let the chili stand, uncovered, 10 minutes. Stir well and season to taste with salt.

Note: You can substitute a 4-pound chuck-eye roast, well trimmed of fat, for the steak.
Yield: 6-8 servings
Source: Brown Eyed Baker, adapted from Cook's Illustrated

Friday, July 6, 2012

reupholstery: take two

the green monster
I said it would be a cold day in hell before I attempted reupholstery again. Well, guess what folks, the weather in hell must be cooler than Kansas because I've volunteered to assist my friend, Renee, with a new reupholstery project. I couldn't help myself. I somehow suppressed those memories of long nights pulling staples and volunteered myself as Renee's reupholstery life coach.

Oh, Katy, will you ever learn?

We found the above chair flea marketing the other day and absolutely loved the unique shape. The green crushed velvet? Not so much. I'm intrigued by this period of time when people felt that crushed velvet was the premier fabric choice for upholstery projects. I'm guessing that time probably coincided with a spike in hallucinogen drug sales. But that's just speculation.

Anyway, Renee and I have chatted about the end goal for this chair. She really wants a bright, fun print like the images below. We've also discussed painting the wood legs (which are in pretty rough condition) a nice, clean white color.

source: pinterest
source: absolutely beautiful things
source: graham and green 
source: kelly green interiors

I'm definitely pumped to see the final result. Considerably less pumped for the amount of work ahead for Renee and I. Thoughts?

Thursday, July 5, 2012

southern comfort apple pie


Hope everyone had a great 4th of July! Mine was fairly eventful...and by eventful I mean accident-prone. Pretty typical for me. The day began with a direct hit to the leg by a wiffle ball and ended with not one, but two fireworks-related grass fires. Soooo all in all, a pretty good little Independence Day. :)

Dad smoked a pork loin and we had all the BBQ fixins. Potato salad, baked beans, pasta salad. All delicious. My contribution to the day was a Southern Comfort Apple Pie. I've made this pie countless times and people tend to freak out a little bit over this here pie. It's won me money, got me on TV, and won me the love and affection of millions (okay, that last one is a bit of a stretch, but you get the picture).

I made this pie last 4th of July for an ex who claimed to not like pie. He took one look at this (rather homely) pie and proclaimed it too ugly to eat. However, as I've claimed time and again, this pie works miracles. After convincing him to try just one bite, he immediately demolished about half the pie, and then informed me that I was not allowed to make this pie for any other men...he loved it that much. In fact, I'm pretty sure that he would have run away with this pie if he could have. But, you know what? This pie is so good I don't even blame him.

I'm so excited to share this pie recipe with you today. It's perfection in a pan. Enjoy!

Southern Comfort Apple Pie

Topping:
1/2 cup pecan halves
1/3 cup sugar
3 Tbsp firmly packed dark-brown sugar
1/2 tsp cinnamon
1/4 tsp salt
1/3 cup all-purpose flour
1/3 cup (5-1/3 Tbsp) chilled unsalted butter

Preheat oven to 350 degrees. Arrange pecans on a baking sheet in a single layer and toast until a rich brown, 7 to 9 minutes. Coarsely chop nuts and set aside.

In a food processor fitted with a metal blade, process sugars, cinnamon, salt, and flour for about 1 minute. Cut butter into small pieces and add to sugar-flour mixture. Pulse 10 to 15 times until mixture is crumbly. Remove from processor and stir in pecans. Refrigerate topping, covered, until ready to use.

Apple Filling:
5 to 6 medium-sized tart apples, such as Braeburn, Cortland, or Winesap
1/2 cup (1 stick) unsalted butter
3 Tbsp cinnamon
1 cup sugar
3/4 cup Southern Comfort or other bourbon whiskey
1/2 cup whipping cream
1 unbaked pie crust, either homemade or store-bought

Increase oven temperature to 375 degrees. Peel, core, and cut apples into 1/4-inch-thick slices. Melt butter in a large skillet over medium-high heat. When butter starts to foam, add apples and sauté for 5 to 8 minutes. In a small bowl stir together cinnamon and sugar; sprinkle on apples, and stir to combine. Simmer apples over medium-low heat for about 1 minute longer. Remove apples from skillet with a slotted spoon, leaving as much of butter-sugar mixture in skillet as possible. Transfer apples to a baking sheet and arrange in a single layer until ready to use. (If heaped in a pile, they will become soggy.)

Pour Southern Comfort into butter-sugar mixture in skillet. Simmer mixture over medium heat until alcohol burns off, at least 5 minutes (sniff mixture at close range; if it burns your nostrils, the vapors are still burning off). Add cream and continue simmering until mixture is quite thick but still pourable, 5 to 10 minutes. Return apples to skillet and stir to coat.

Transfer unbaked piecrust to pie pan, crimping edges with your fingers or a fork. Prick bottom with a fork. Pour apples and cream mixture into unbaked piecrust (do not fill to more than 1/2 inch below top of crust) and sprinkle evenly with topping. Bake until filling is bubbling and topping is brown, 50 to 60 minutes.

Yield: 1 9-inch pie
Source: The Pastry Queen (the best cookbook purchase you'll ever make)

Wednesday, July 4, 2012

'merica manicures

source: pinkurock.com
Happy Independence Day people! It's not too late to bust out your patriotic side. Grab a frosty beverage, eat a hot dog, and light up a sparkler. It's go time! I hope you all have some fun plans for the day. I'll be attending a pretty intense wiffle ball tournament, eating some BBQ, and indulging in many, many mojitos while I chill in the pool and watch some firecrackers. Sounds like the perfect day if you ask me. :)

I will readily admit that I get in to the cheesy holiday outfit trend. It's my inner old woman coming out. I'm the girl on Valentine's in a hot pink pencil skirt. I'm also the girl who wouldn't be caught dead not wearing green. And Christmas time? Fuggedaboudit. I get a wee bit ridonk in honor of baby Jesus. Tomorrow I will be sporting an entirely white and blue outfit, accessorized with bright red nails and lipstick. That's just how I roll. But if you don't wanna go whole hog with the ol' patriotic ensemble, I suggest starting with something easy and cheap...like a patriotic manicure!

I've been seeing a ton of cute patriotic manicures all over Pinterest lately. It's not too late. Got five minutes before you head out to a BBQ or fireworks show? Bust out some red, white, and blue. Stripes. Stars. Glitter. Hearts. Go for it! God bless America!

source: totallyloveit.com

source: pinterest

Tuesday, July 3, 2012

jalapeño pepper jack scones


For starters, I think it's vital that we do a little Bachelorette recap. First impressions? Pure awkwardness. Yeesh, that Emily still hasn't developed much of a personality, has she? Yikes. Hometown dates are usually a bit awkward but throw Emily into the mix and the result is lots of forced smiles and uncomfortable laughs. I felt like I needed a drink just watching it.

Okay, moving on to the guys, I'll keep this brief.

Chris: Should probably be put on suicide watch. Or homicide watch? Either way, the man is a loose cannon. And not in a good way.

Jef: Little Mr. Skinny Jeans can shoot a gun too? Well color me shocked. I may have to rethink my strict deal-breaker stance on skinny jeans in the future. Goodness.

Arie: I still can't get past his gross kissing behavior. I feel like I need a shower just watching him suck face. Oy gevalt. His family didn't help his case either. His mother is a shoe-in if they ever create a Real Housewives of Dutch-land reality show and, generally speaking, talking in a foreign language in front of guests is probs not the best manners. Just saying.

Sean: I might get a hernia trying to find a flaw with this guy. Gorgeous, sweet, AND a jokester? Tell me it isn't true. He must have webbed feet or an outie belly button or something. Anything. Ugh.

My fingers are crossed that Arie will be the next to go. After that, I really don't care if it's Jef or Sean...because I'd happily take either of those leftovers. Am I right?

So, let's move on to food related things. As you may know, if I were to be named queen of something, I would undoubtedly be the reigning scone queen. They are my go-to breakfast and I bake them in mass quantities. I love scones every day of the week...and twice on Sunday.

This particular variety of scone is a bit out of the box. What we have here is not your standard blueberry or pumpkin scone. No sir. This here is a savory scone, jam packed with cornmeal, jalapeños, and pepper jack cheese. Sometimes a gal just needs something savory and cheesy and delicious in the AM. Plus, Momma K had a bounty of jalapeños from her garden. Thus, these scones were meant to happen.

I've made these scones time and time again and they turn out perfect every time. Don't be intimidated by the peppers. As long as you remove most of the seeds, you'll be fine...or leave them in if you like a little heat. ;) Enjoy!

Jalapeño Pepper Jack Scones

Ingredients:
2 tsp olive oil
2 medium jalapenos, some seeds removed, diced small
1 Tbsp all-purpose flour
1/4 pound pepper jack cheese, cut into small cubes
2 cups all-purpose flour
2 Tbsp cornmeal
1 Tbsp baking powder
1 tsp salt
8 Tbsp (1 stick) unsalted butter, cold, cut into small cubes
2 large eggs
1/2 cup heavy cream (plus more for brushing the tops of the scones)
sea salt (for sprinkling)
Directions:
Place a rack in the center of the oven and preheat to 400 degrees F.

Heat 2 teaspoons of olive oil in a small saute pan and cook diced jalapenos until softened, about 3 to 5 minutes. Let the diced peppers cool and them mix with the diced cheese. Toss mixture in 1 tablespoon of flour and set aside.

In a large bowl, whisk together the flour, cornmeal, baking powder and salt. Work in the cold butter with your fingers until the mixture resembles coarse meal. Some butter pieces will be the size of peas and the flour will be nice and crumbly.

Whisk together eggs and heavy cream. Add the wet ingredients all at once to the dry ingredients, fold together with a fork until almost fully incorporated. Add the jalapeno and cheese mixture to the shaggy dough and work together. Turn dough out onto a lightly floured surface and knead for about 30 seconds. Form into a disk about 8 inches around and 2 inches thick. Cut disk into six wedges and refrigerate for 10 minutes before baking.

When ready to bake, place chilled scones onto a baking sheet lined with parchment paper. Brush with heavy cream and sprinkle with coarse sea salt. Bake for 20 to 25 minutes until golden brown and delicious. These are best served the day they’re made.

Yield: 6 scones
Source: Joy the Baker

Monday, July 2, 2012

italian ragu


Hey there. How was your weekend? Mine consisted of wedding/bridesmaid dress shopping, a BBQ, and Magic Mike. Definitely a successful weekend if you ask me. To those of you debating about seeing Magic Mike, let me be the first to say that it is worth the $10. Channing Tatum in a combat vest writhing around on a stage? Yup, I'd pay money to see that. If only it were real life. (sigh) I'm gonna need a moment; I'm feeling a little fuhklempt. Talk amongst yourselves.

Anyway! A few things I think we need to be super pumped about this week:

1. Hometown dates on The Bachelorette! Predictions: Chris will crash and burn, Arie will reveal himself for the true d-bag he is, Emily will realize that Jef is the man of her dreams, and Sean will realize he is the man of MY dreams. Fingers crossed!

2. A show you need to be watching: The Newsroom. Sooo good. Just watch it please.

3. The 4th of July! Duh. I'll be making my traditional apple pie so expect that recipe here soon. I suggest you all make it, too. This recipe has single-handedly won me money, caused men to pronounce their love for me, and gotten me on TV. Have I talked it up enough now? Prepare yourselves...

4. Also, fireworks. That is all.

Okay, let's switch tracks and talk pasta. Question: is there anything better than a big ol' bowl of pasta? Answer: yeah, probably. But pasta is pretty high up there...especially when it's paired with a homemade ragu. I'm all for the jar o' Prego in a pinch. But if you have the time to make homemade sauce...well, just do it.

I made this for my favorite friends, Renee and Nathan, who are new parents. They have a two-week-old at home and, well, who needs a home-cooked meal more than new parents? No one, I tell you. To all those new parents out there...God bless you.


Italian Ragu

Ingredients:
1 cup chopped onion
1 celery rib, chopped
1 carrot, chopped
3 cloves garlic
2 Tbsp. olive oil
½ lb. ground sirloin
½ lb. bulk hot Italian sausage
1 Tbsp. tomato paste
¼ cup dry red wine
¾ cup low-sodium chicken broth
1 can crushed tomatoes (14 oz.)
1 tsp. each dried basil and dried oregano

Directions:
Mince onion, celery, carrot, and garlic in a food processor; set aside.

Heat oil in a large sauté pan over medium-high. Add sirloin and sausage to pan and sauté until brown. Add minced onion, celery, carrot, and garlic to pan; sauté 2–3 minutes.

Stir in tomato paste and cook 1 minute. Stir in red wine and cook 1 minute. Add broth, tomatoes, basil, and oregano; reduce heat to a simmer and cook 15 minutes. Serve over pasta or polenta.

Yield: 4 servings
Source: Cuisine at Home